

How to Draw A Snow Leopard. The animal kingdom is full of amazing creatures to behold, and each one is amazing.
Also, check out Free Printable Lion Coloring Pages.
However, some animals manage to take it to a new level, and the snow leopard is a prime example.
This animal is stunning and, unfortunately, very rare in the wild, with an alarming abundance of living specimens.
This is terrible and makes everyone even more valuable. Drawing a snow leopard is a great way to commemorate this amazing creature. If you like to do that, come to the right place!
How to Draw A Snow Leopard
Step 1
We’ll start this snow leopard drawing guide by outlining the head and some details of the face.
For the sides of the face, we’ll use several smaller curved lines that connect. This will help the face look nice and hairy.
The ears are small and can be drawn with more curved lines. Add some rounded shapes for the inner ears, and then we can draw some facial details.
Draw some small eyes with lines emanating from them, and then we can finish with the nose and mouth. Once these are all drawn, we can proceed to the second step.
Step 2
For this second part of your snow leopard drawing, we’ll draw the beginning of the back and the outside leg.
Extend a gently curved line from the head backward for the back. This will curve down to begin forming the first leg.
The leg will be fairly smooth and long enough, ending with small rounded toes.
Before we continue, let’s also add some points to the leopard. They may require a bit of patience, so go slow!
Draw a few dots on the face; then, you can draw some small rounded shapes in the other parts of the leopard you’ve drawn so far.
Step 3
This animal has quite a furry chest that helps keep it warm, and that’s what we’re going to draw along with the next step in this step of our guide to drawing a snow leopard.
For the chest, we’re going to use a lot of small curved lines to give it that furry look we’re going for. Once you have the contour, add lots of curved line detail in the bust.
Then you can draw the next stage. This one will be farther away, making it look bigger than the previous one.
Please make sure you use a jagged line for the outline, as we also aim for it to look furry.
Step 4
In this step and the next, we will add the final details of this snow leopard design!
For this step, we’ll first draw the tail that curls to the left. Like many other parts of this snow leopard, we’ll use jagged lines to add furry texture to the tail.
Unlike regular leopards with thin, sleepy tails, this tail is very thick. You can also add some spot details.
The last thing you have to do in this step is to outline the last leg so we can continue with the finishing touches in the next step.
Step 5
You can now finish the final details in this step of our how-to draw a snow leopard guide.
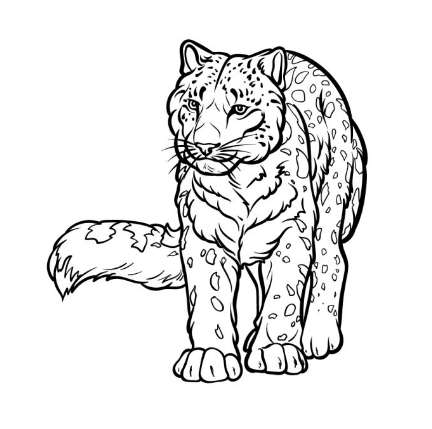
First, refine the outline of the last section you started in the previous step, then add the usual details.
Finally, after drawing, add some minor details to the rest of the snow leopard, and then you’re ready for the final step!
Before proceeding, ensure you add any additional elements, details, or ideas you would like. What background do you think this magnificent snow leopard would suit?
Step 6
In reality, these animals don’t have the brightest color scheme, which helps them blend in better with their snowy surroundings.
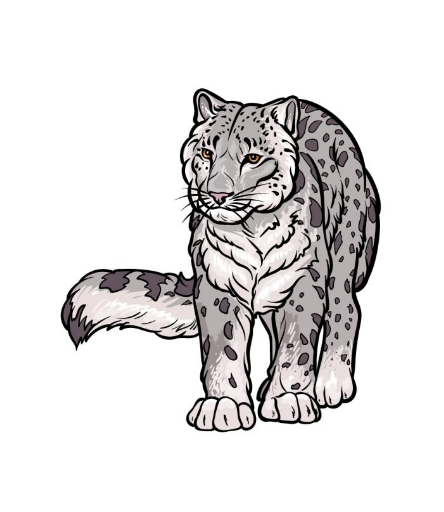
This is how we colored our example of this snow leopard design and used different shades of gray for the body.
The spots are quite dark grey, but the shades of gray are light.
When coloring your image, use the best hues and artistic mediums.
Your Snow Leopard Drawing is Finished!